Create and manage Custom states
Custom states give you greater control over the order fulfillment process by allowing you to set informative markers or enforce strict operational rules. By using and managing custom states effectively, you ensure smoother workflows, fewer errors, and better communication within your teams.
Written By Petter Johansson
Last updated 11 months ago
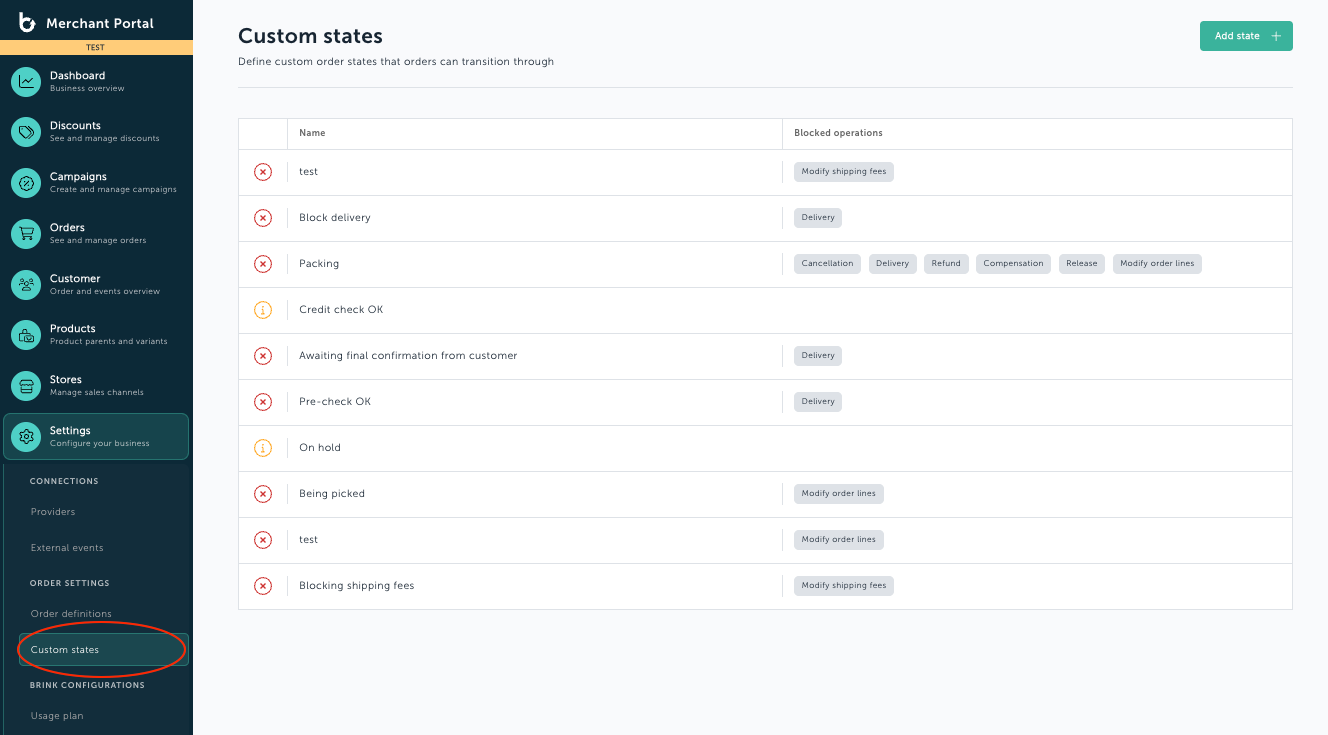
Introduction
Custom states in Brink Commerce are a way to implement workflow steps within the order process. These states help teams manage operations and ensure important checks or blocks are respected during fulfillment. Custom states can either be informative or blocking, depending on their purpose.
This guide explains how to create, edit, delete, and manage custom states directly in the Merchant Portal.
Understanding Custom States
Informative States:
Provide updates or status messages about an order.
Do not block any operational actions.
Useful for internal communication, such as noting that an order has passed a manual check.
Blocking States:
Actively prevent further actions on an order until the blocking state is resolved.
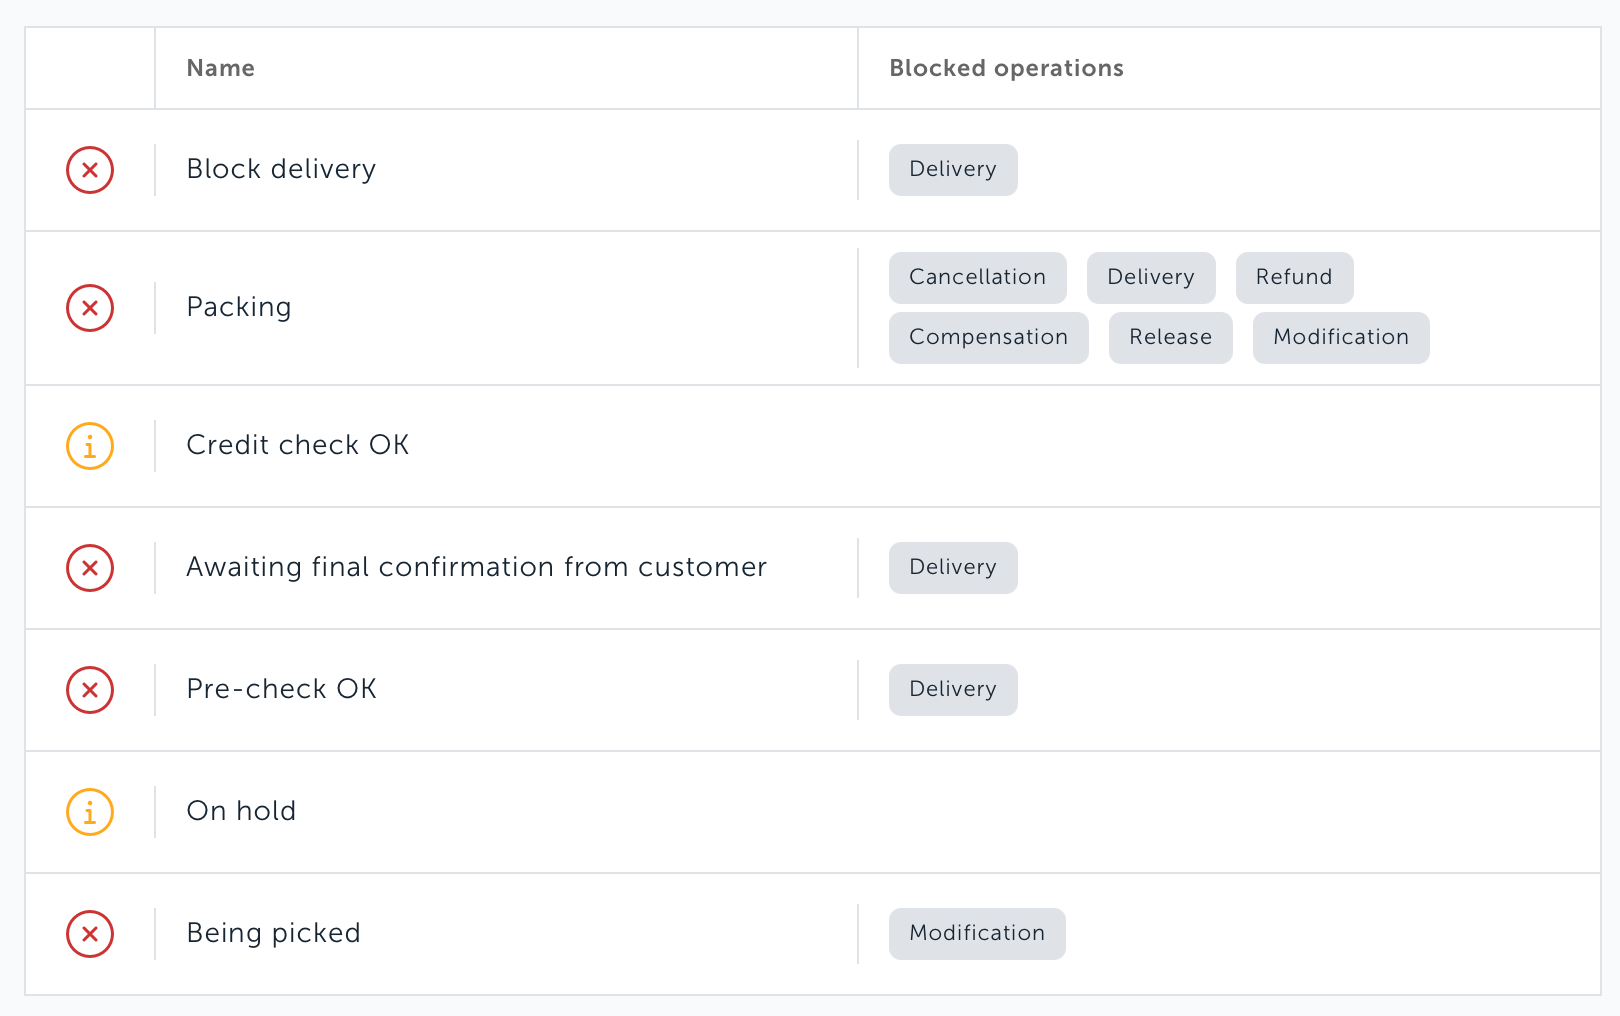
Can block operations like:
Cancellation – Prevent cancelling an order (e.g., picking has started).
Delivery – Prevent initiating delivery (e.g., payment issues).
Compensation – Prevent issuing compensation until an internal process is completed.
Refund – Prevent processing a refund for a specific reason.
Release – Block releasing payment until criteria are met.
Modification – Prevent modifying the order under specific circumstances.
Tip: Custom states can also be managed via API for full integration into your systems.
Steps to Add a Custom State
Navigate to Custom States
In the Settings menu, select Custom States.
Add a New Custom State
Click the Add State button in the top right corner.
Fill in State Details
Name: Give the state a descriptive name.
ID (Optional): You can specify an ID or leave it blank to auto-generate one.
Type of State:
Informative State: Displays updates in the order history without operational impact.
Blocking State: Actively prevents actions based on the selected blocked operations.
For Blocking States:
Select the operations you want to block (e.g., Cancellation, Delivery, Refund, etc.).
Save the Custom State
Click the New Custom State button to save your configuration.
Steps to Edit an Existing Custom State
View Existing States
Navigate to Settings > Custom States.
View the list of created states, including their names, types, and any operations they block.
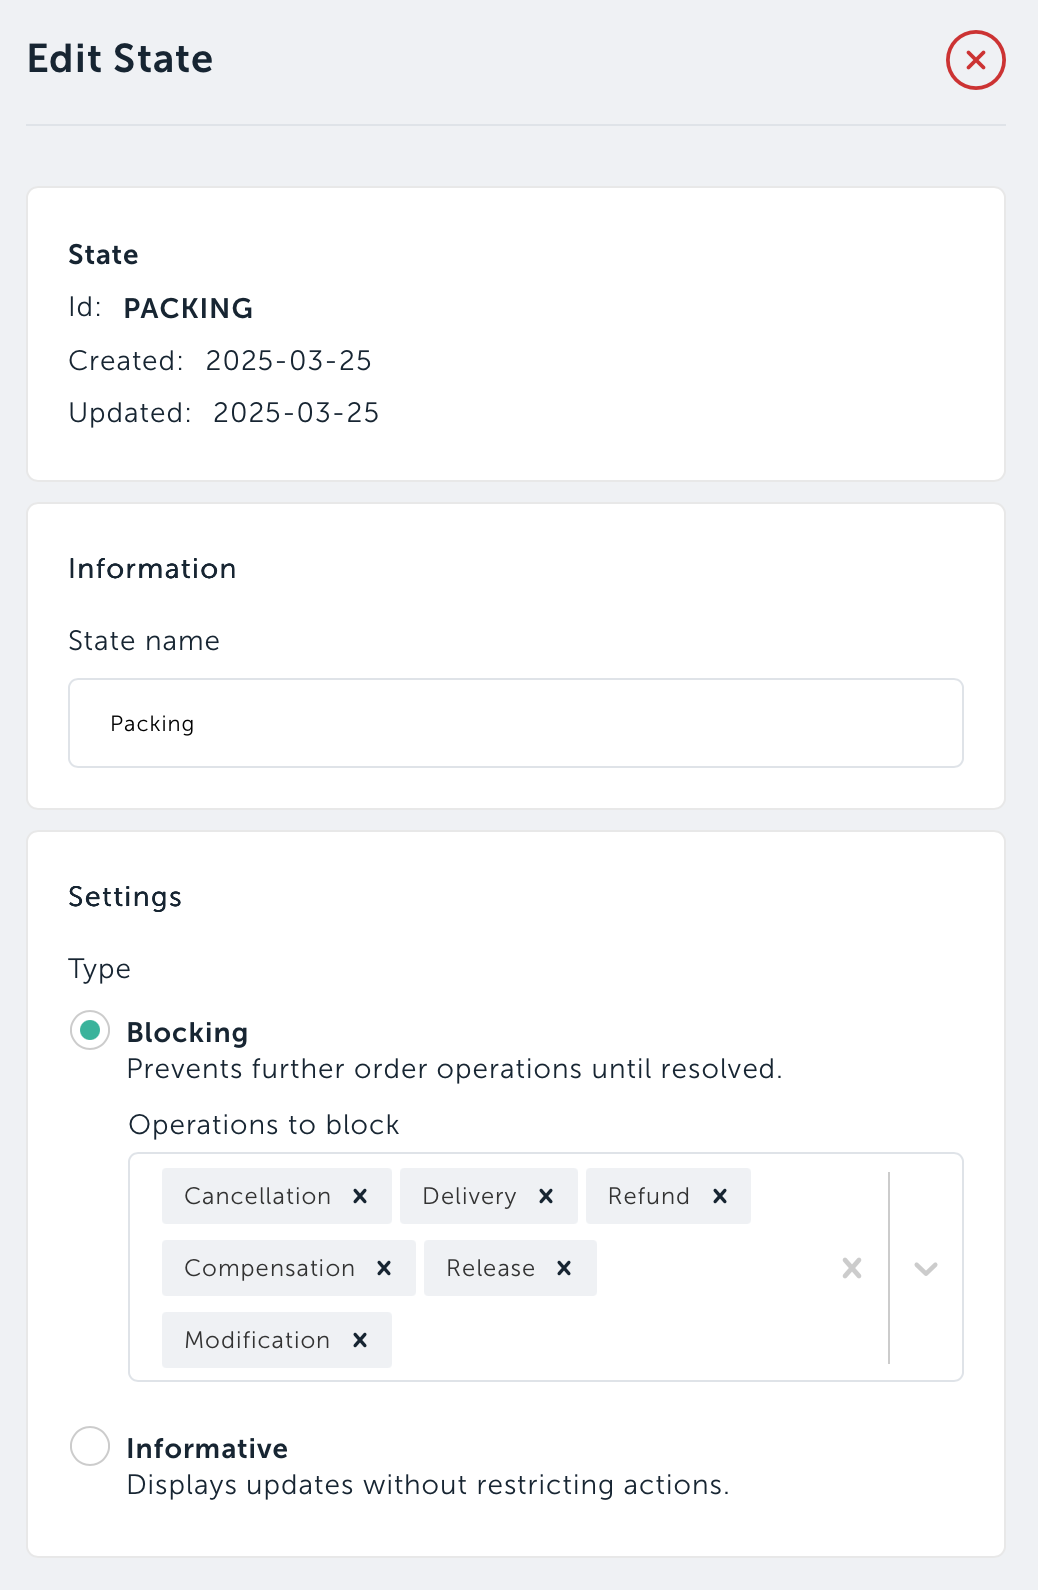
Edit a State
Click the name of the state you want to edit.
For Informative States:
Update the name as needed.
Click Update State to save changes.
For Blocking States:
Update the name or add/remove blocked operations.
Click Update State to apply the changes.
Steps to Delete a Custom State
Navigate to the Custom State
Click the name of the state you wish to delete.
Delete the State
In the edit pane, click the Delete button.
Confirm deletion when prompted.
Managing Orders with Custom States
Navigate to Orders
Select Orders from the menu and then click Orders again.
Search or Filter for Orders
Use the search bar to find an order by ID or customer name.
Alternatively, use the filtering function to display:
Orders with blocking custom states.
Orders with specific custom states (blocking or informative).
Open and Manage an Order
Open the order you want to manage.
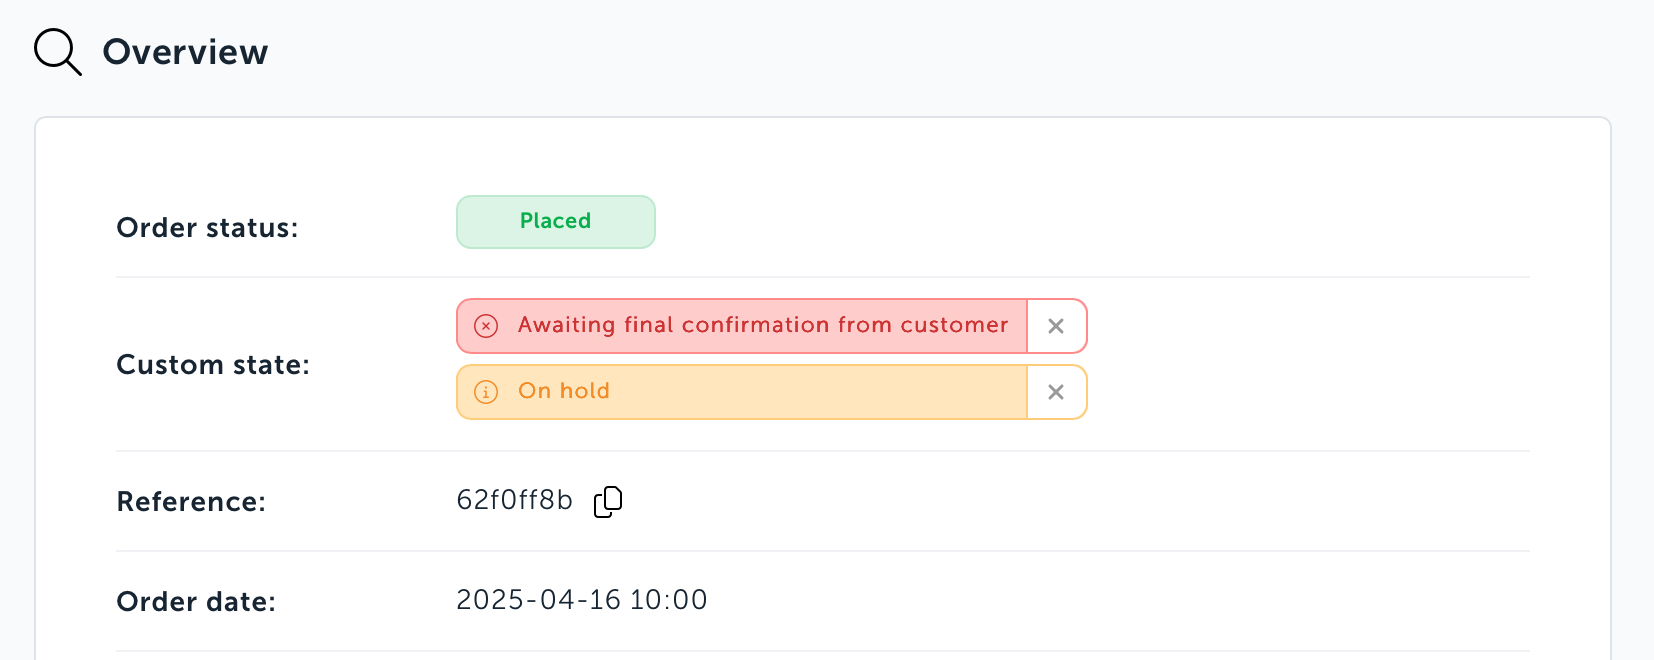
In the Overview section, view the active custom states applied to the order.
Remove a Blocking State (If Needed)
If you have the appropriate permissions, you can remove a blocking custom state to allow further actions.
Confirm the removal to proceed.
Important: Always follow your internal processes when removing a custom state.
Was this helpful?
Still need help? Ask the team