Configure and use Custom Reason Codes
Customizable Reason Codes for refunds and compensations, allowing merchants to define specific refund and compensation reasons.
Written By Petter Johansson
Last updated 11 months ago
Introduction
Brink Commerce introduces Customizable Reason Codes for all order operations, such as refunds and compensations, allowing merchants to define specific refund and compensation reasons. These codes provide consistency, automation, and efficiency across integrations and the Merchant Portal (OMS UI).
With this feature, merchants can configure and manage reason codes in the Settings area of the Merchant Portal, ensuring standardized workflows for order operations.
Steps to Configure Custom Reason Codes
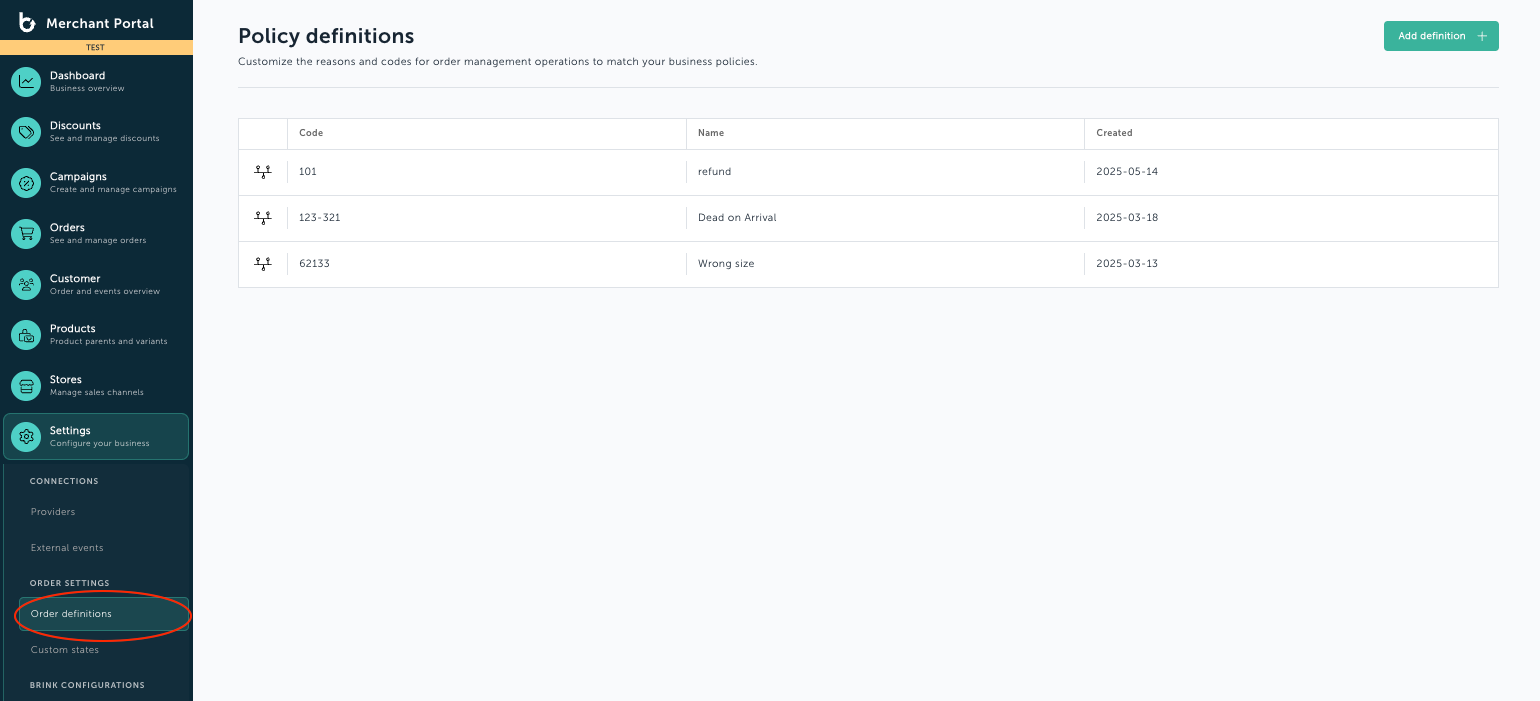
1. Navigate to Order Definitions
Open the Settings menu.
Select Order Definitions.
2. View Existing Reason Codes
You will land on the Policy Definitions page.
Here, you can see all previously created codes (if any) and their creation dates.
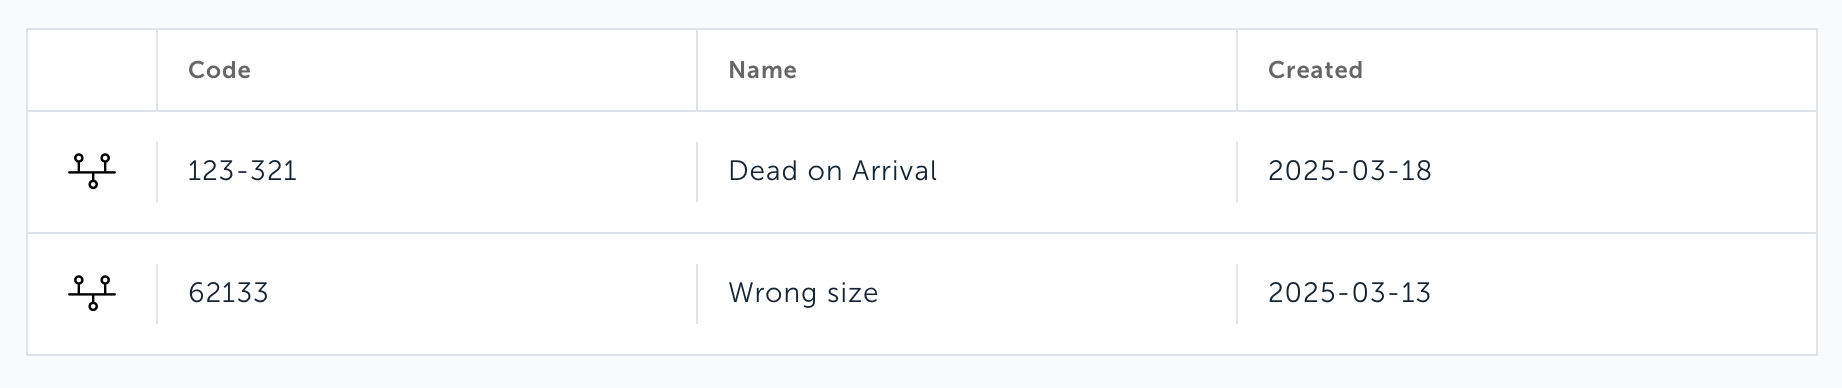
3. Add a New Reason Code
Click the Add Definition button in the top-right corner.
Fill in:
Code: Enter a code based on your internal processes.
Name: Provide an explanatory name for the code.
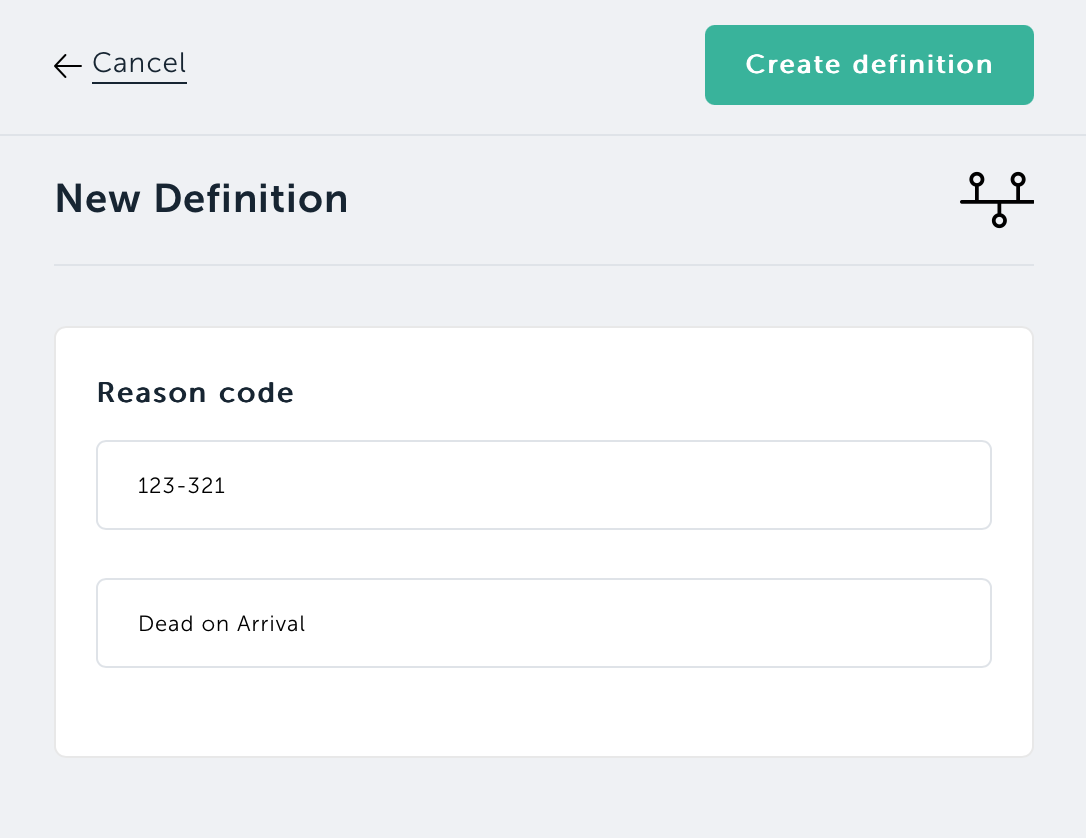
Click Create Definition.
You will return to the Policy Definitions page, where the new definition is now listed.
The code is now available for use in refunds and compensations.
Editing or Deleting a Reason Code
1. Edit a Code
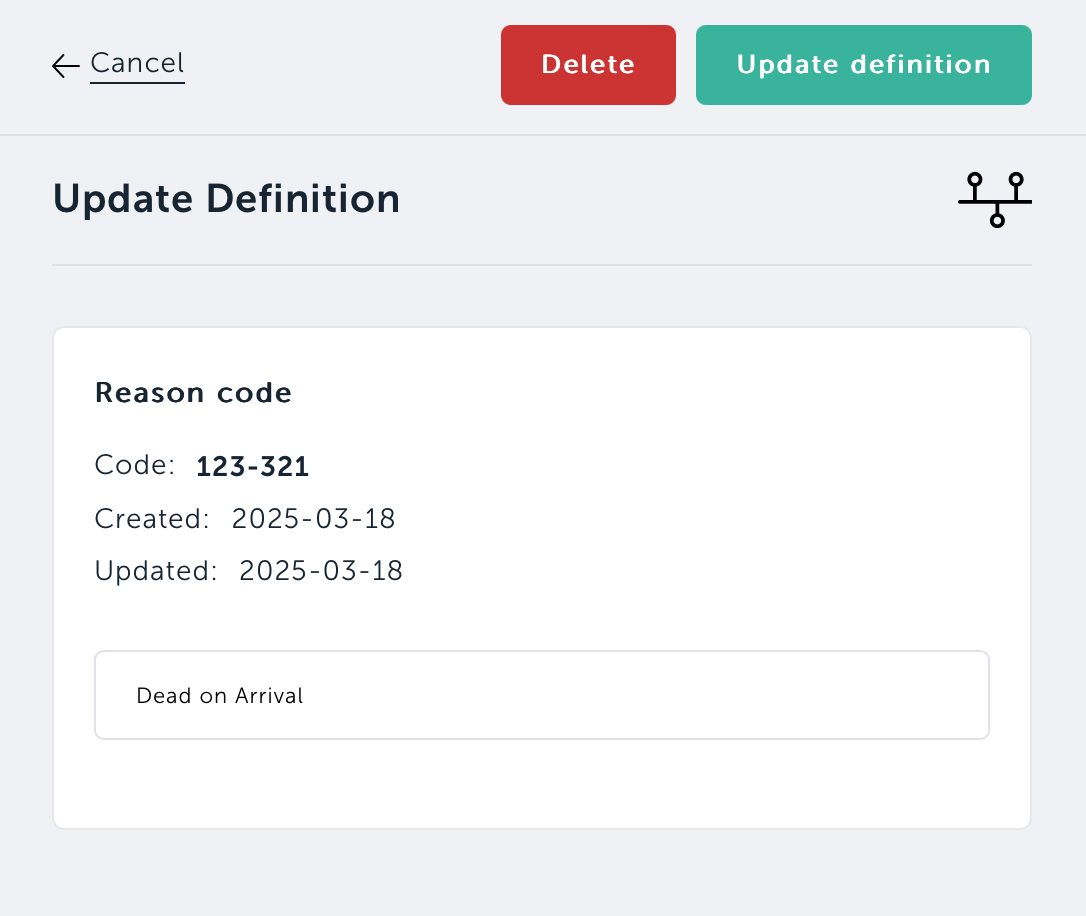
Click on any part of the row containing the code you want to edit.
In the edit pane, modify the name (the code itself cannot be changed as it is tied to past transactions).
Click Update Definition to save the changes.
2. Delete a Code
In the edit pane, click the Delete button at the top.
Confirm the deletion when prompted.
Example Usage: Applying a Reason Code in a Refund
1. Navigate to an Order & Initiate a Refund
Open an order and start a refund (See How to issue a refund for detailed steps).
2. Expand the Reason Field
In the updated order draft, locate and expand the reason field.
3. Select a Predefined Code
Choose the appropriate reason code from the dropdown.
(Optional) Add a comment if necessary.
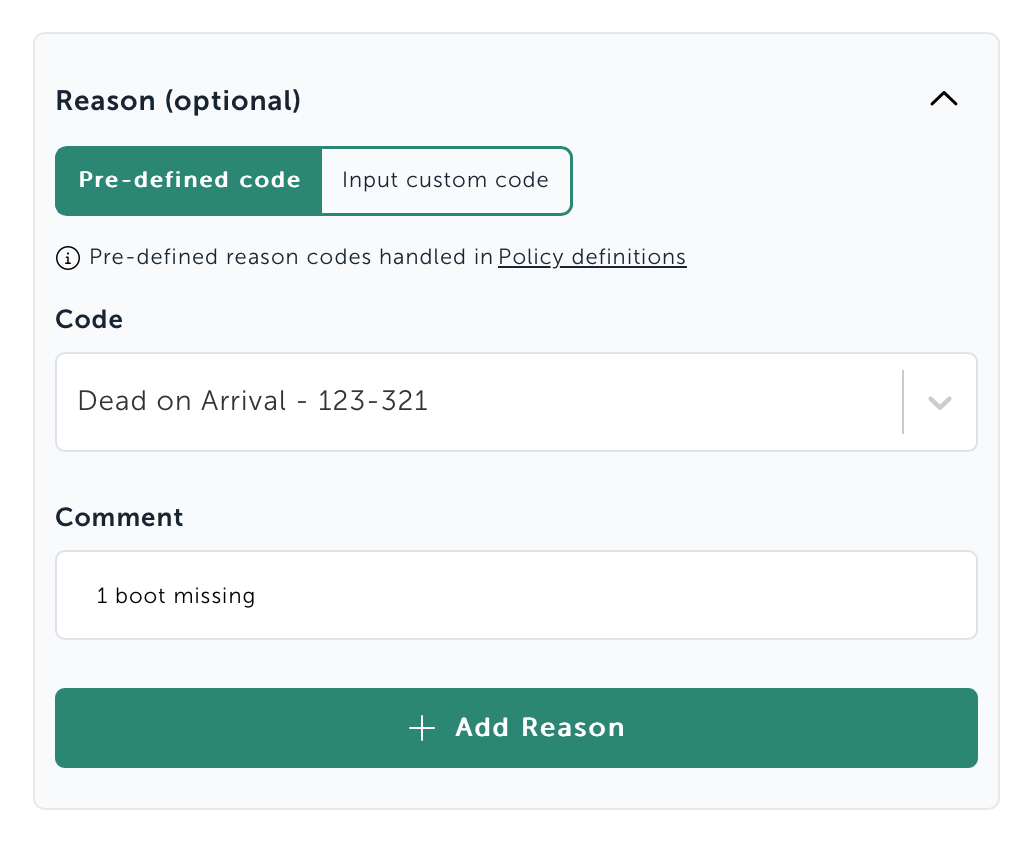
4. Apply the Reason Code
Click Add Reason and continue with the refund process.
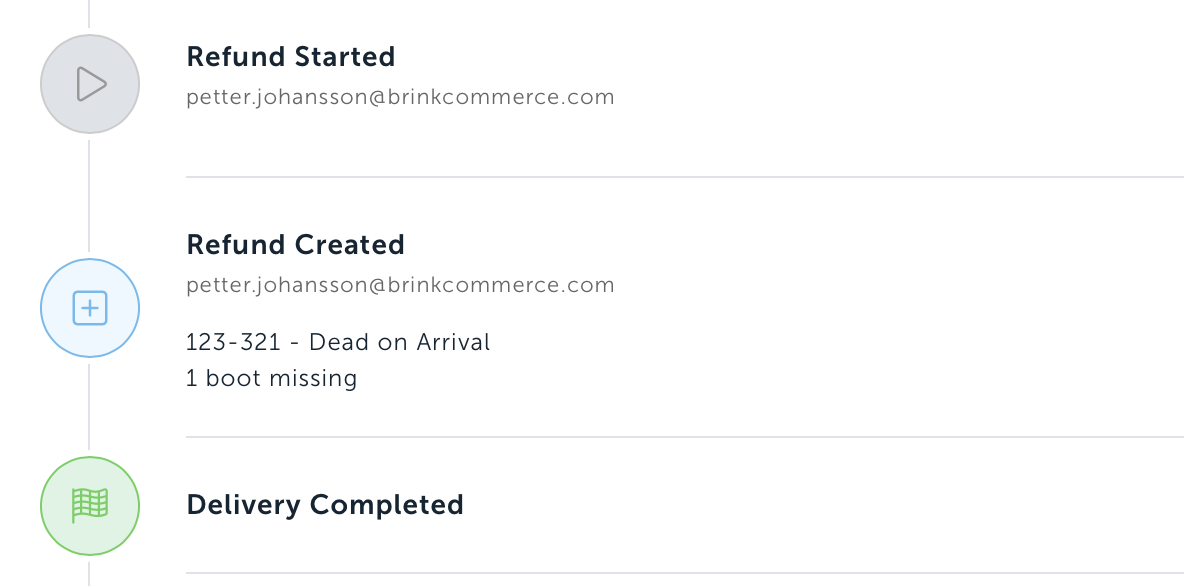
5. Review in Order History
Once the refund is completed, check the Order History tab.
The refund action will display the selected reason code and any additional comments.
Was this helpful?
Still need help? Ask the team