How to issue a refund
Refunds in Merchant Portal allow you to compensate customers for specific items or other order-related costs like shipping fees. A refund is tied to individual order lines or fees.
Written By Petter Johansson
Last updated 11 months ago
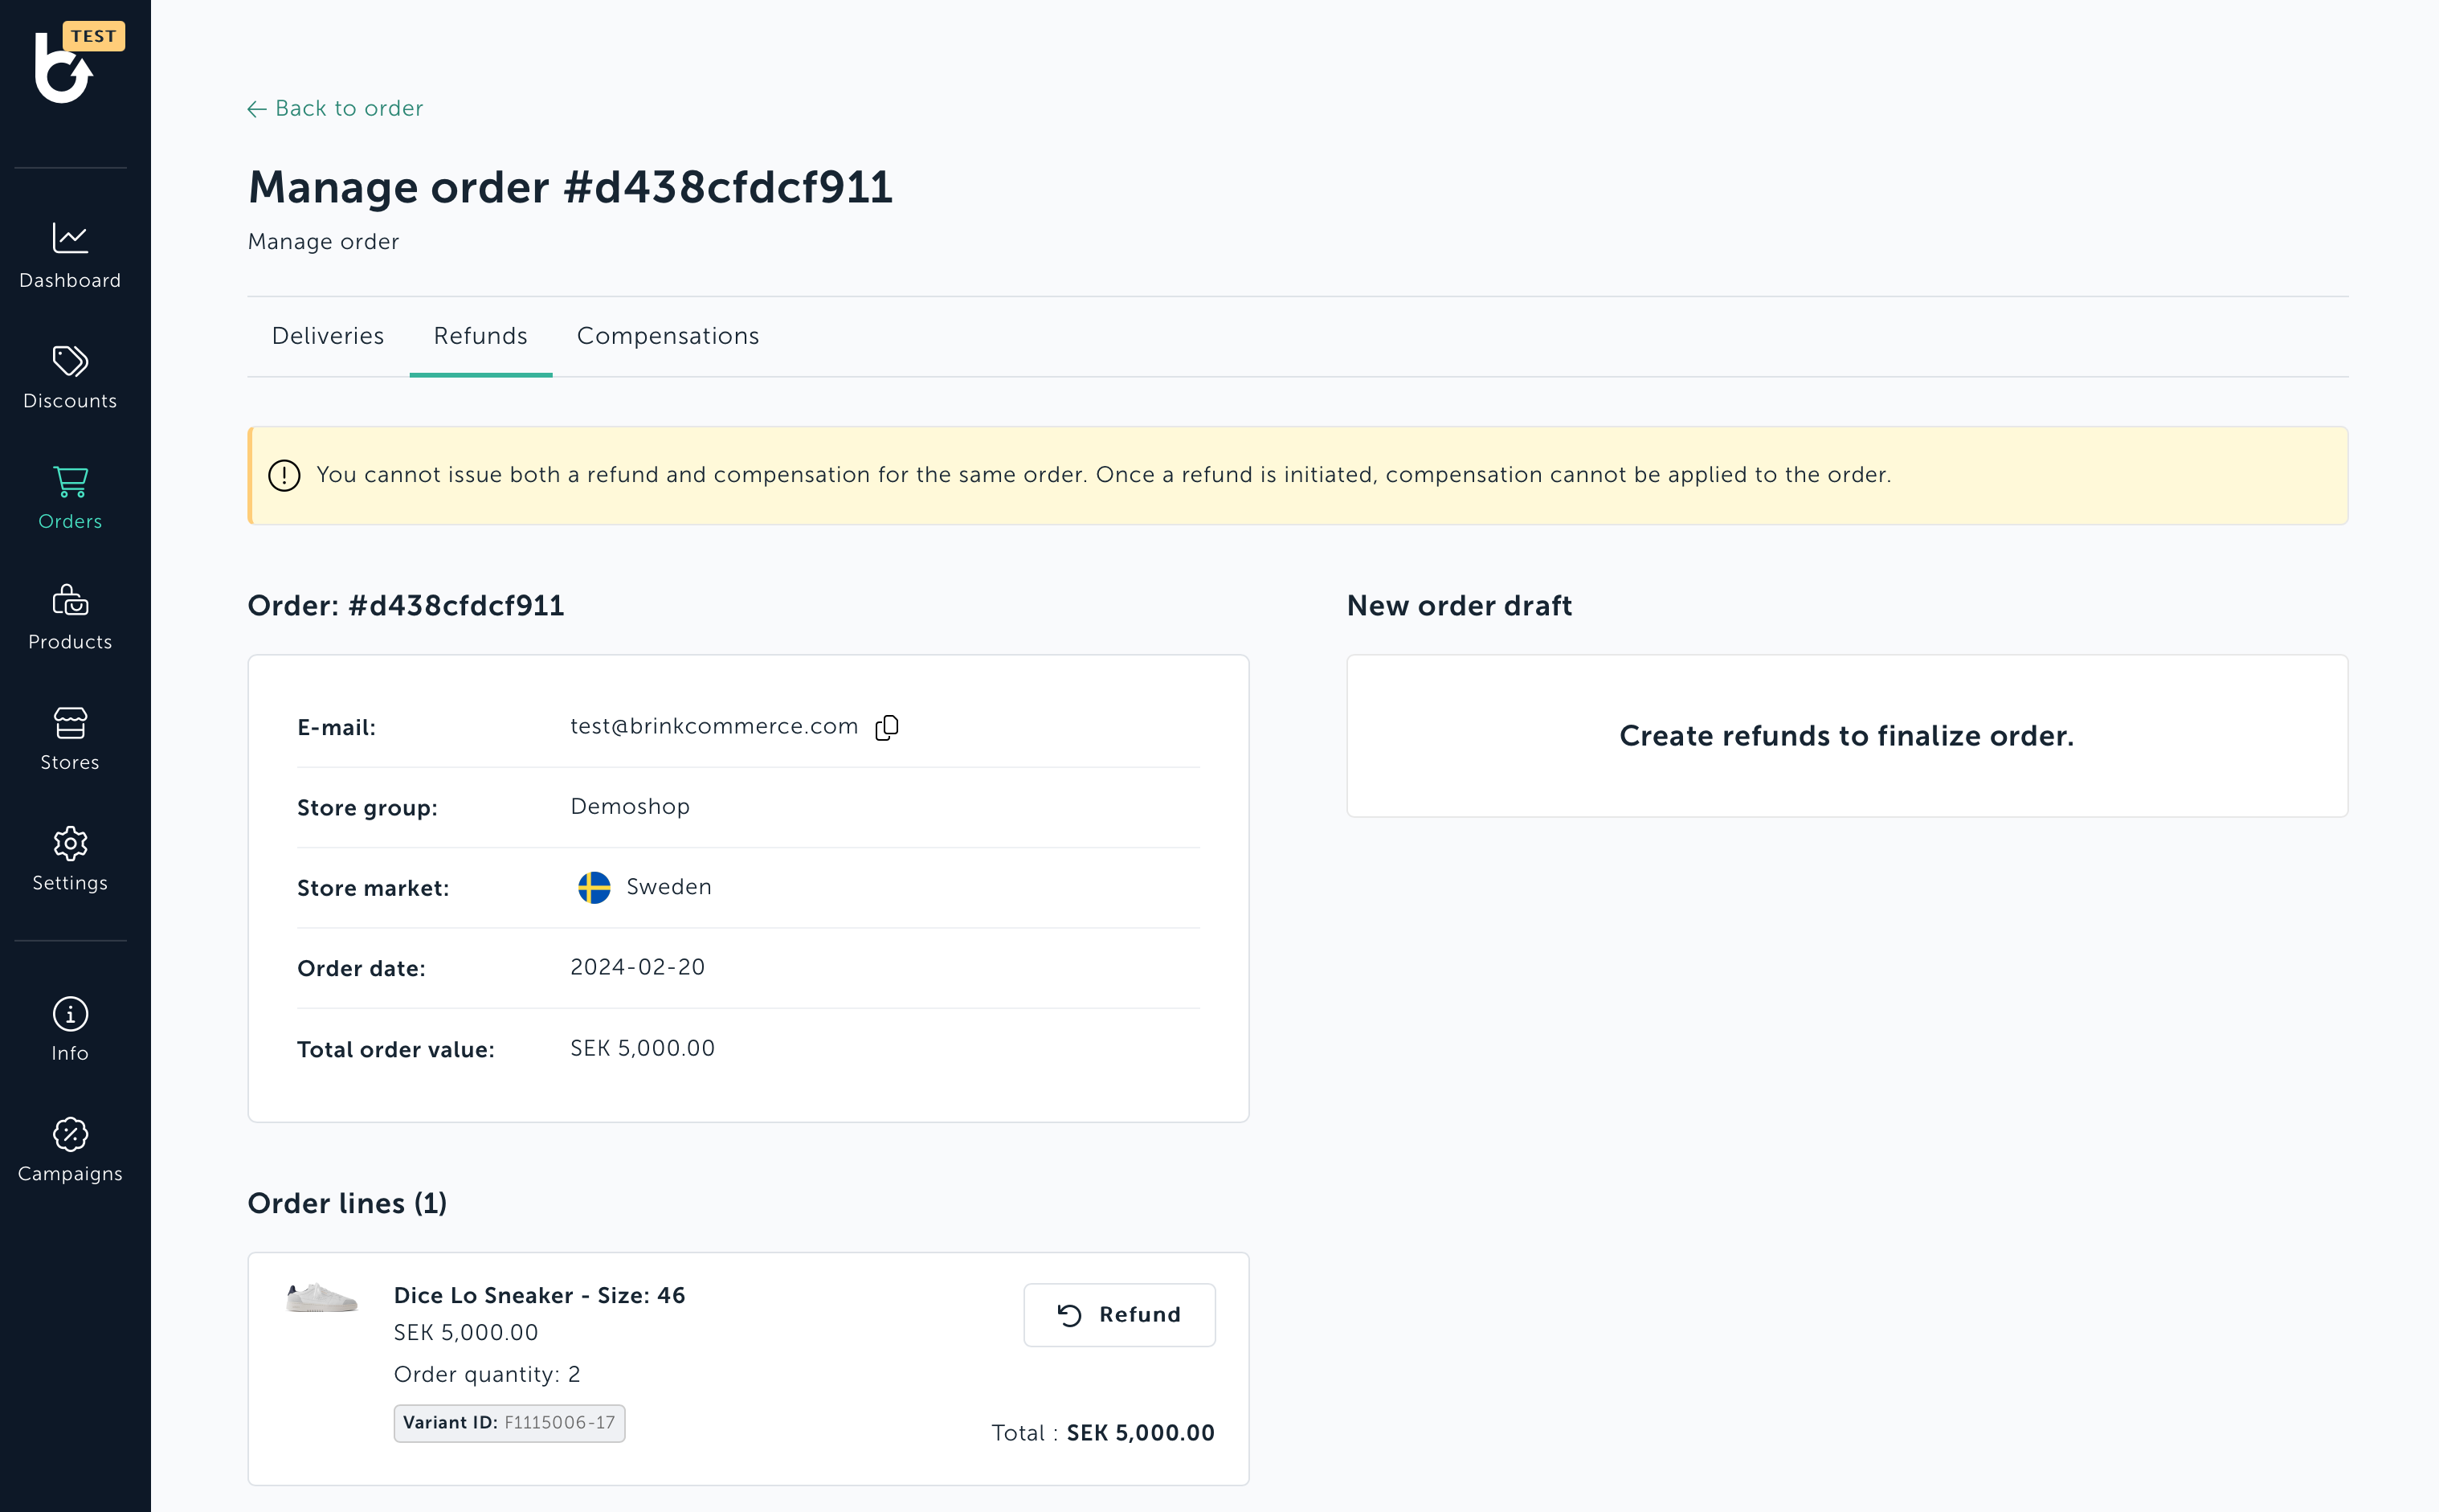
Steps to issue a refund
1. Find the Order
Navigate to the Orders section from the menu and select Orders again.
Use the search field to locate the specific order you want to refund.
Once found, click on the order to view its details.
2. Manage the Order
Click Actions in the top-right corner of the order page and then select Manage Order
On the Order management page, switch to the Refund tab.
Note: You cannot issue a refund for an order that has already been compensated, and vice versa. The order must also be marked as delivered before you can issue a refund.
Note: Some Payment Providers does not allow refunds.
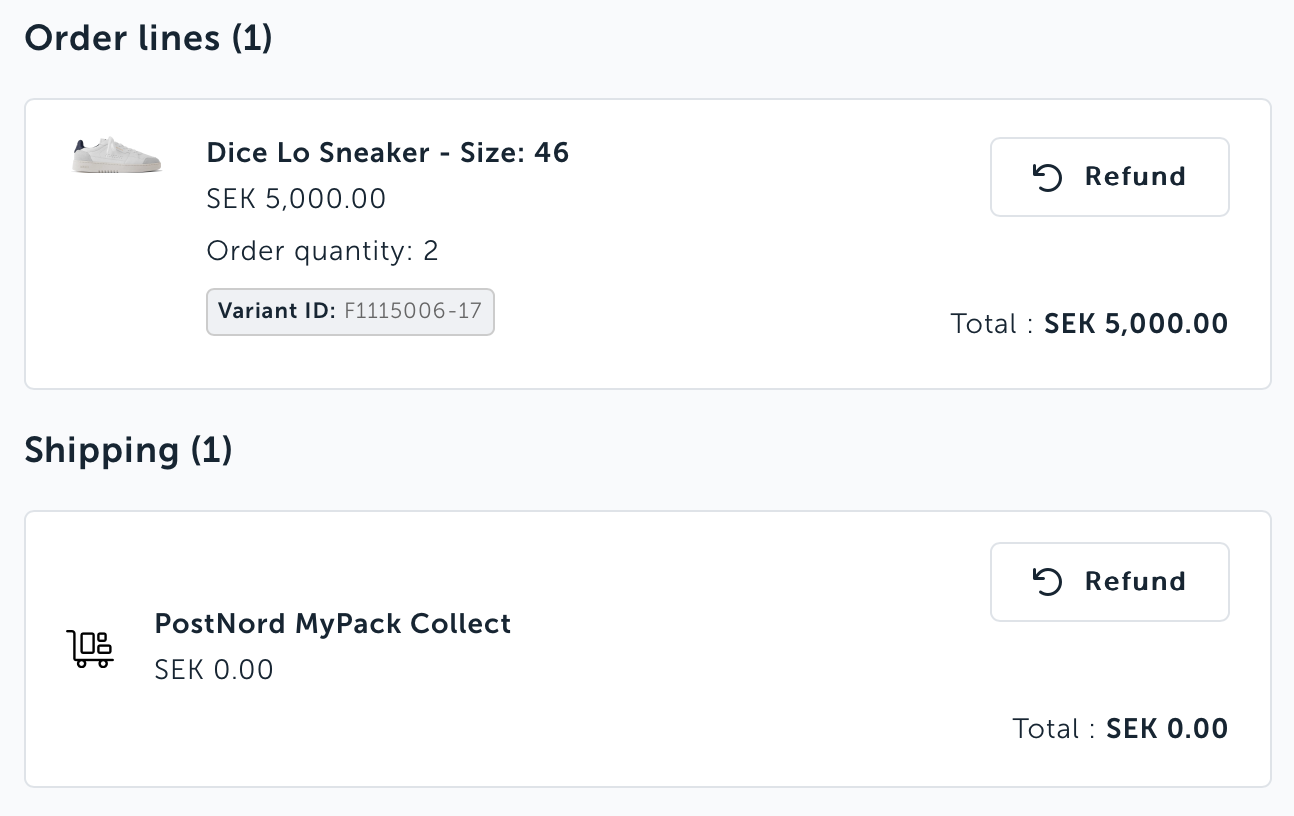
3. Select the Order Line to Refund
Choose the specific order line or product variant you want to refund, then click the Refund button.
A new refund draft will be created.
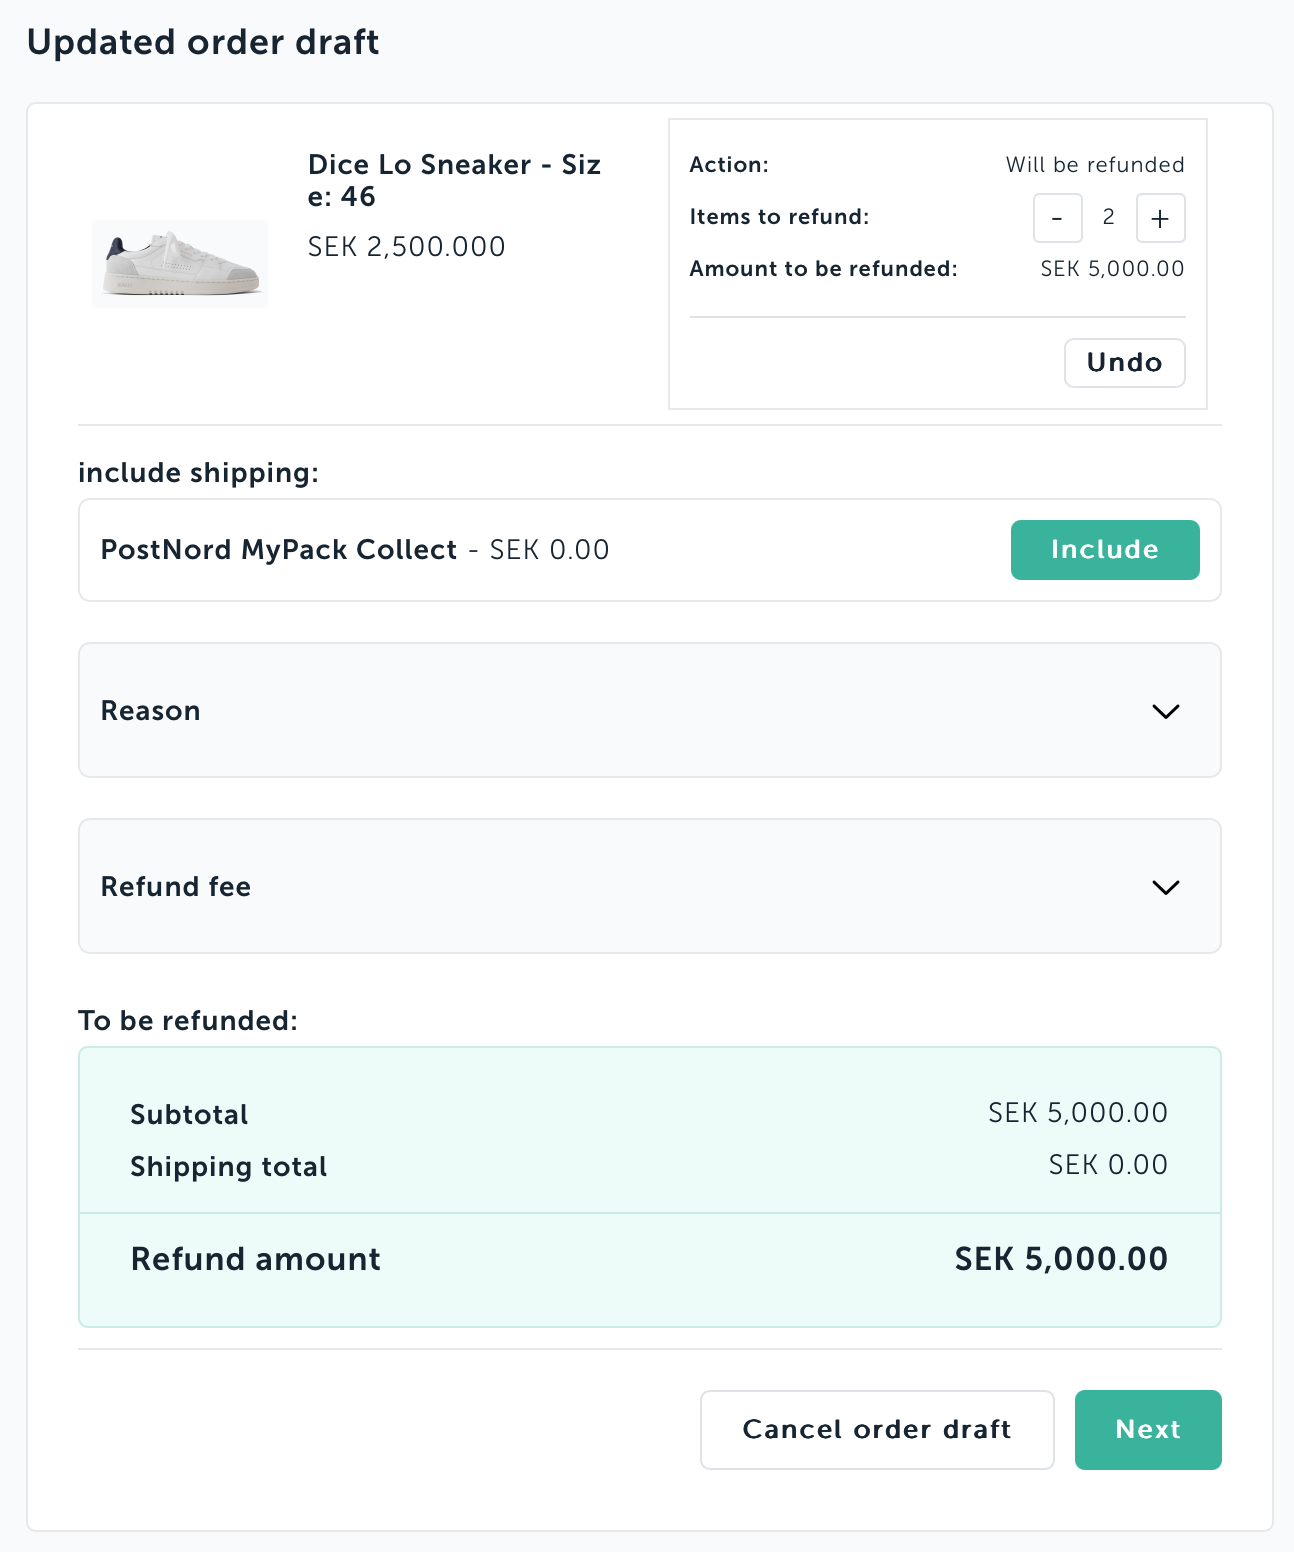
4. Modify the Refund Draft (Optional)
If needed, you can add more order lines or include shipping fees in the refund.
You can also choose to refund only a portion of an order line if it contains multiple items.
5. Add a Reason for the Refund (Optional)
Enter a reason for the refund in the designated field. Please follow your internal processes for providing the correct reason codes or descriptions.
6. Add a Refund Fee (Optional)
Some payment providers (PSPs) such as Klarna, Adyen and Walley allow for Refund fees to be added. To add one, do this:
Enter the amount and tax in minor units (e.g., 10000 for 100).
Provide a name for the refund fee.
Click Add Refund Fee to include the fee in the refund.
7. Review the Refund Draft
Verify that all the details, including the total amount, refund items, and fees, are correct.
8. Proceed to the Next Step
Once everything checks out, click Next to proceed.
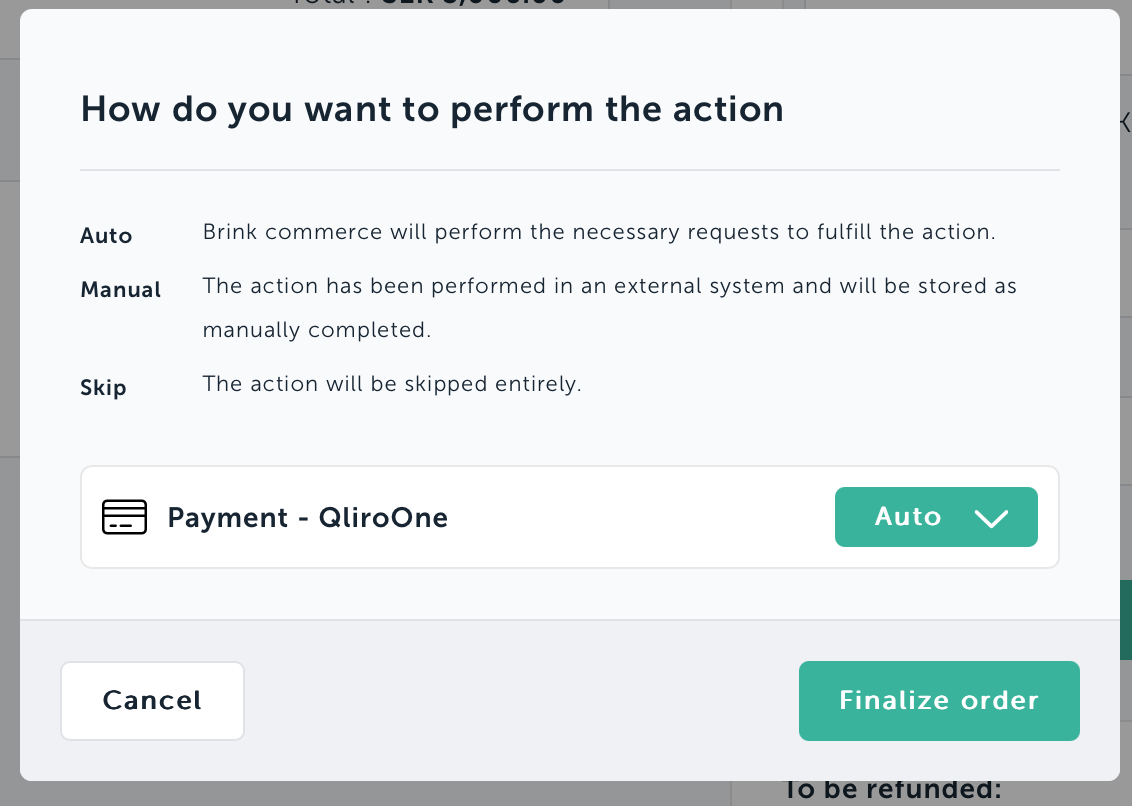
9. Select Refund Handling Method
A dialog box will appear, asking how you want to handle the refund. You have three options:
Auto: Brink Commerce will automatically perform all necessary actions to process the refund.
Manual: Choose this option if the refund has already been issued through another system.
Skip: This option allows you to skip any automatic actions and simply store the refund.
10. Apply Refund Handling to All Items
Make a handling choice for each item in the refund, including product variants and shipping fees.
11. Finalize refund
Finally, click the Finalize order button to issue the refund.
Was this helpful?
Still need help? Ask the team